Table of Contents
- 1Getting Started
- 2Creating an Account
- 3OTP Verification
- 4Signing In
- 5Dashboard Overview
- 6My Business
- 7Catalogues & Menus
- 8Business Branches
- 9Manage Notices
- 10Manage Products
- 11Manage Orders
- 12Delivery Settings
- 13Banner Management
- 14Business Chats
- 15Reviews & Ratings
- 16Settings
- 17My Promotions
- 18Notifications
- 19Popote
Getting Started
More Classifieds is Kenya's digital marketplace where sellers list businesses, showcase products, receive orders, and connect with buyers nationwide. Whether you run a retail shop, restaurant, service business, or anything in between — More Classifieds gives you the tools to get discovered and sell more.
As a seller your dashboard gives you full control: manage your business profile, product catalogue, incoming orders, promotional banners, customer notices, and direct chats with buyers — all from one place.
One account, full control
A single seller account manages your business and all its branches. Each branch can have its own products, notices, banners, and chats, all accessible from your unified seller dashboard.
Creating an Account
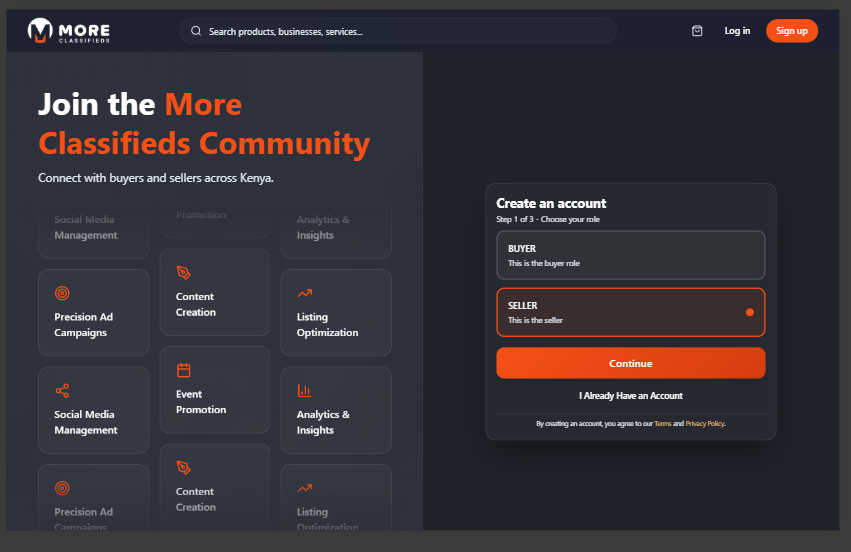
Click Sign up in the top-right corner of the homepage. Seller registration has three steps.
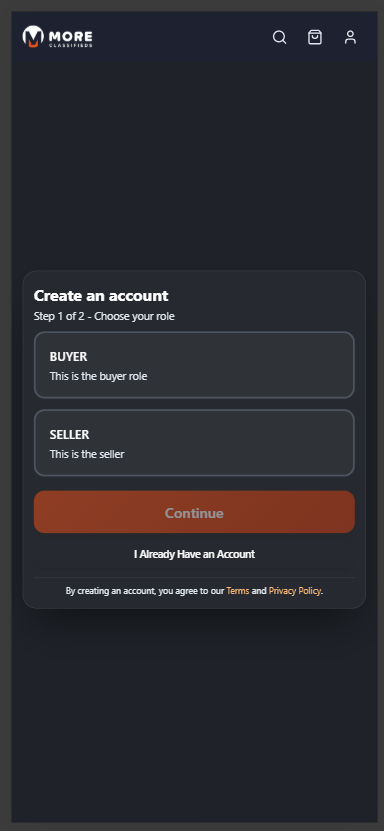
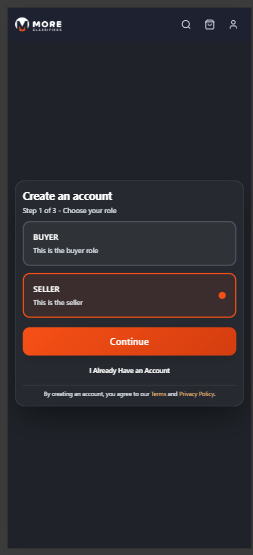
Step 1: Choose Your Role
Two role cards are shown — Buyer and Seller. Click the Seller card (it highlights with an orange border) then click Continue.
Step 2: Account Type
This step is shown to sellers only. Choose between:
- Individual — A sole trader or personal business.
- Company — A registered business or organisation.
Select the option that matches your situation and click Continue.
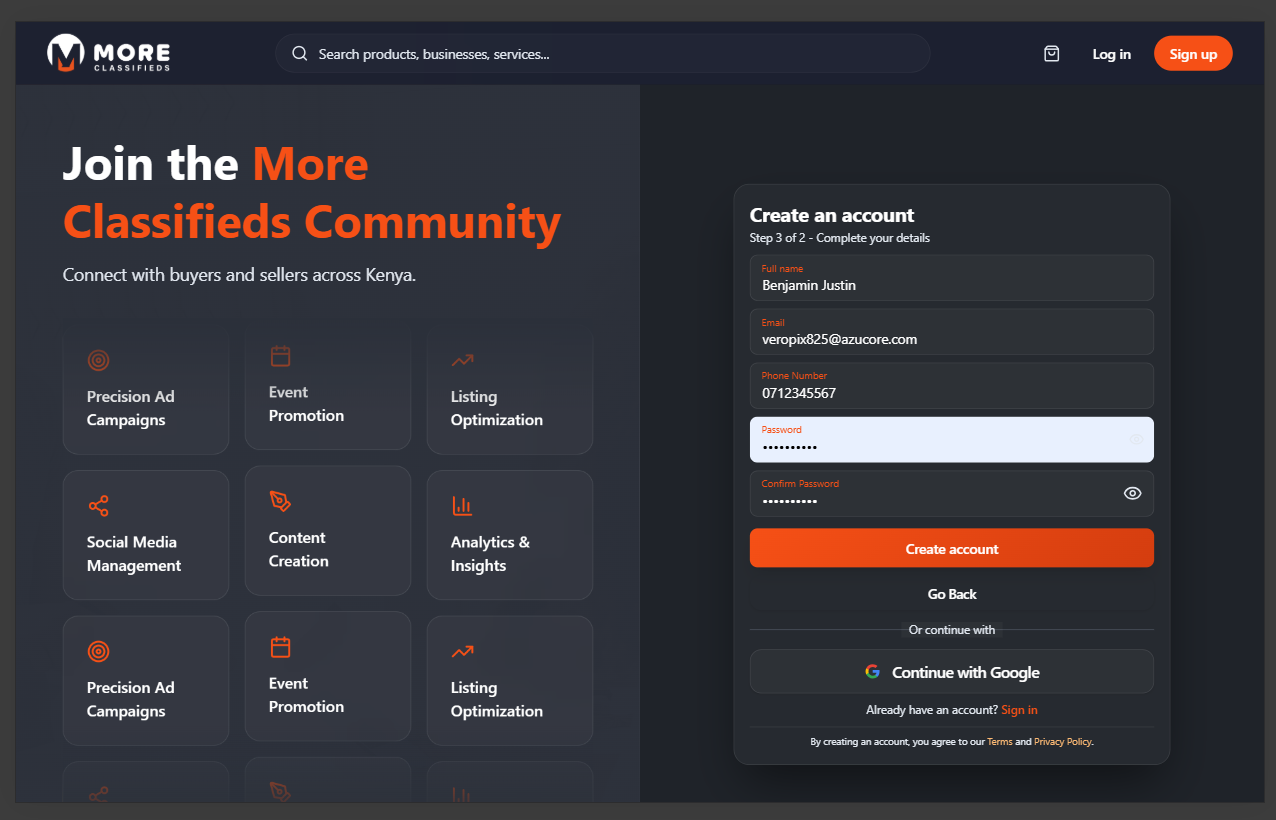
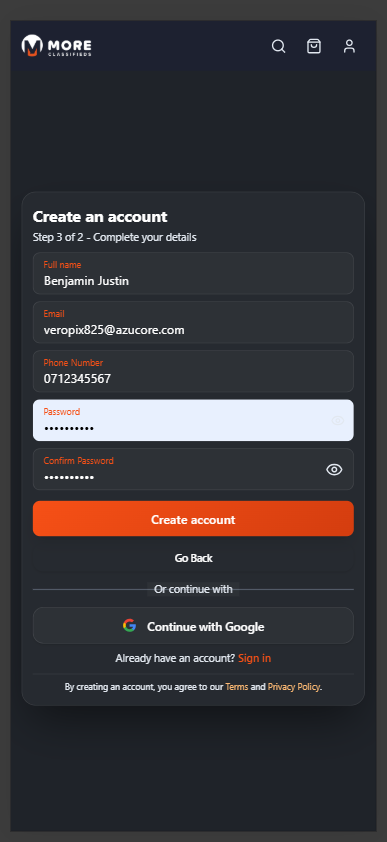
Step 3: Your Details
Fill in your personal account details:
- Full Name — Your name as the account holder.
- Email — Used to log in and receive notifications. Optional if you use a phone number.
- Phone Number — Your Kenyan mobile number (e.g. 07XXXXXXXX). Optional if you use email.
- Password — Minimum 6 characters.
- Confirm Password — Must match the password above.
Alternatively click Continue with Google to sign up instantly using your Google account. Then click Create account.
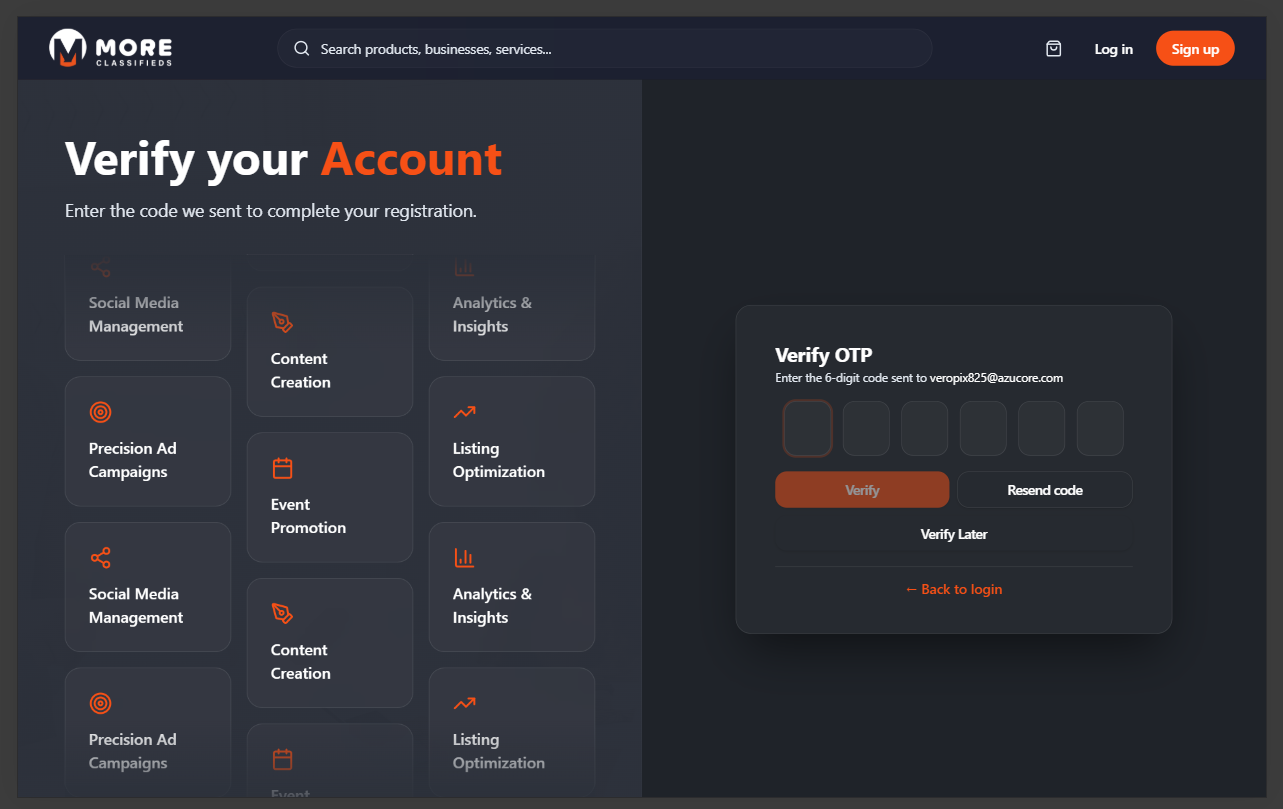
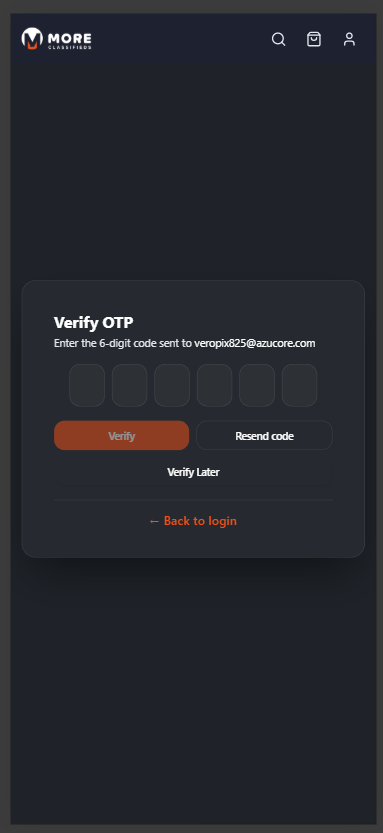
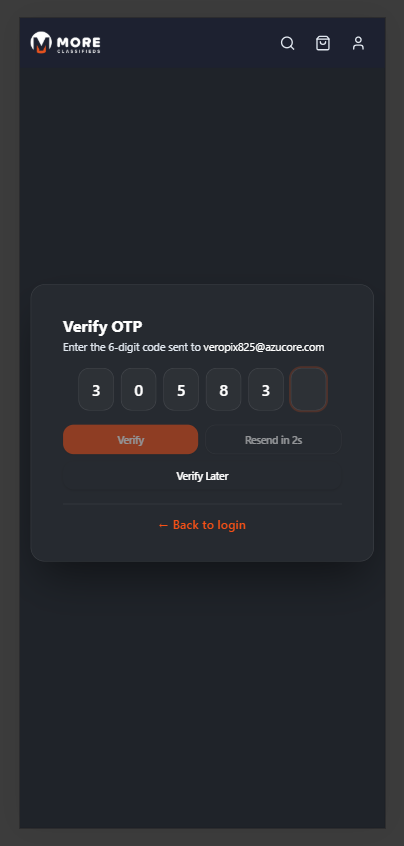
OTP Verification
After creating your account a 6-digit One-Time Password is sent to your registered email or phone. Six individual digit boxes appear on screen — type the code (it auto-advances between boxes) and click Verify. The button activates automatically once all six digits are filled.
If the code doesn't arrive, wait for the countdown timer to reach zero and click Resend code. Click Verify Later to skip for now, though some features will be restricted until your account is verified.
A green confirmation appears on success and you are taken to the sign-in page.
Check your spam folder
If the OTP email doesn't arrive within a few minutes check your spam or junk folder before requesting a resend.
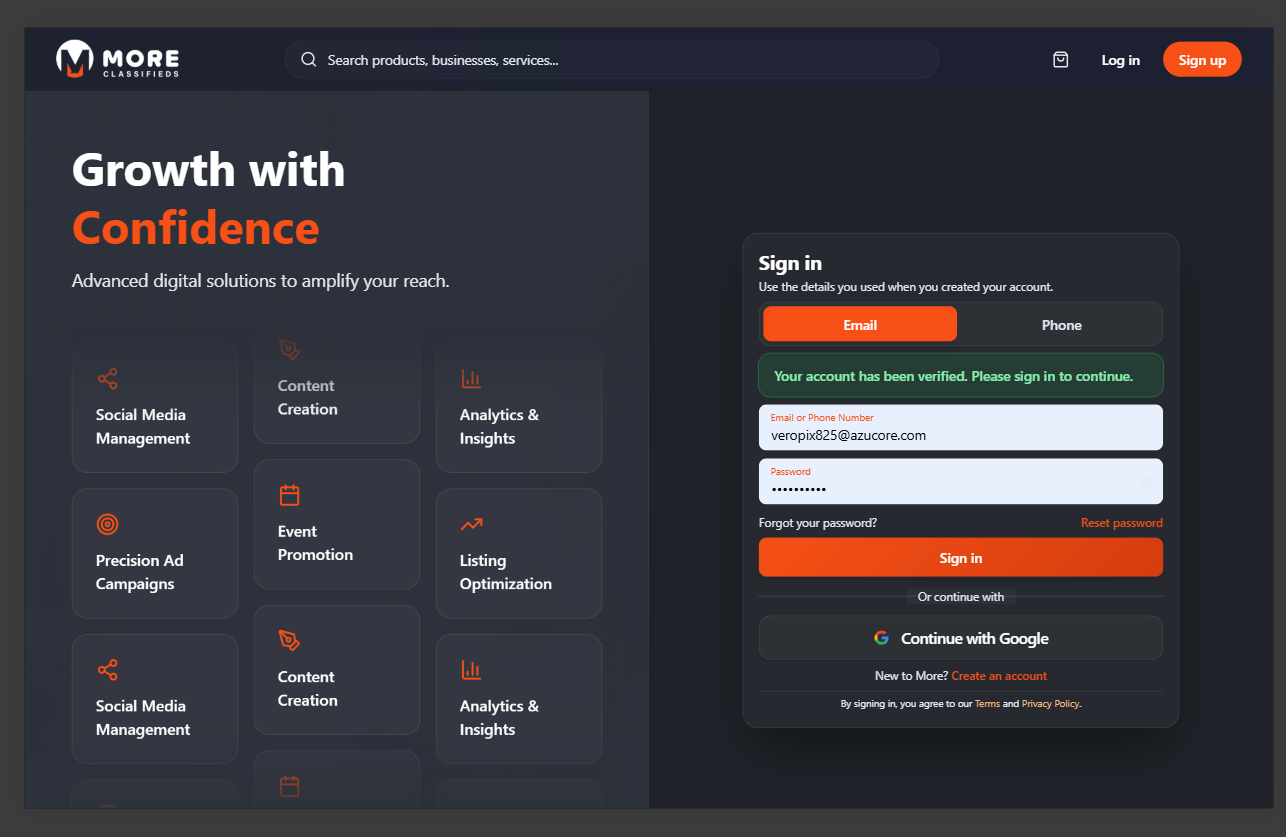
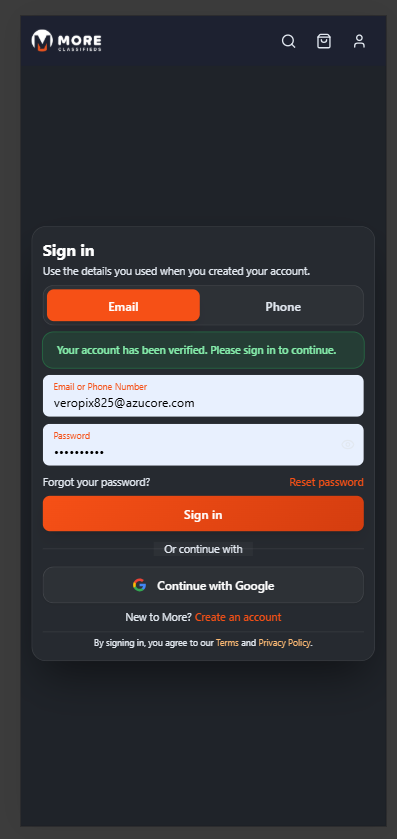
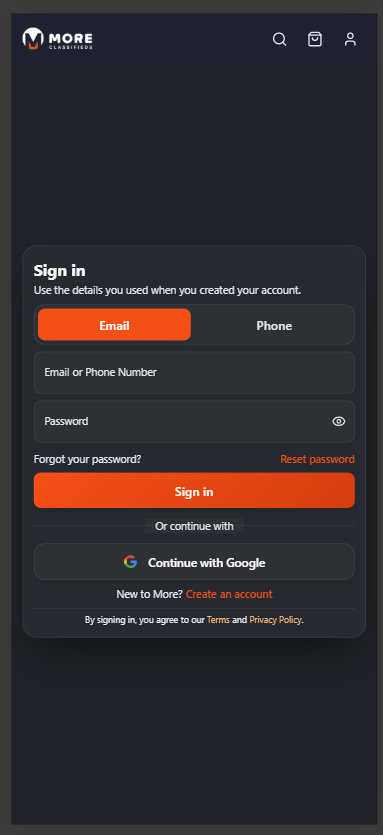
Signing In
Click Log in in the top-right corner of any page. The sign-in form has two tabs:
- Email — Enter your registered email and password then click Sign in.
- Phone — Switch to this tab and enter your registered phone number.
Click Continue with Google for passwordless sign-in via your Google account. Use the Forgot your password? link to trigger a reset email if you've lost access.
After signing in you are taken directly to your seller dashboard. The header shows Seller Dashboard as the page subtitle.

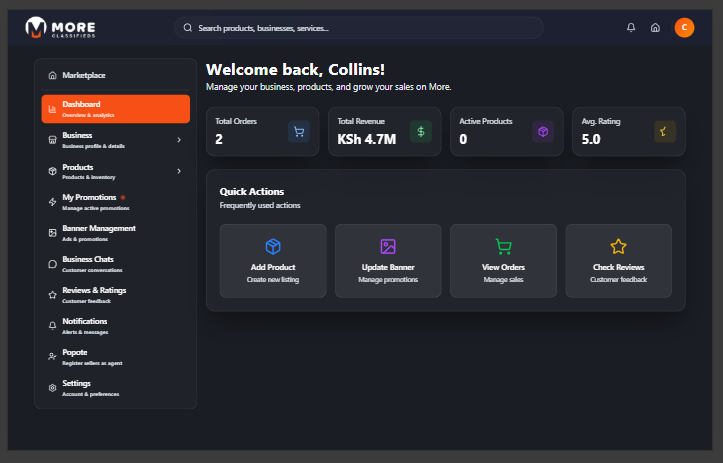
Dashboard Overview
The seller dashboard uses a two-column layout on desktop: a fixed sidebar on the left and the main content area on the right. On mobile the sidebar is hidden — tap the menu icon in the top-left header to open it.
The Dashboard home tab shows four live stat cards at the top — Total Orders, Total Revenue, Active Products, and Avg Rating — giving you an instant health check of your business.
| Section | What it does |
|---|---|
| Dashboard | Overview with total orders, revenue, active products and rating |
| My Business | Create and edit your business profile, logo, cover, and hours |
| Catalogues & Menus | Group products into menus, catalogues, price lists, or lookbooks |
| Business Branches | Add and manage physical branch locations |
| Manage Notices | Publish announcements visible on your business profile |
| Manage Products | Add, edit, and delete products in your catalogue |
| Manage Orders | View and action incoming customer orders |
| Delivery Settings | Set delivery fees, per-km rates, and service radius |
| My Promotions | View and manage active paid boosts for your business or products |
| Banner Management | Create promotional banners that appear on the marketplace |
| Business Chats | Direct messages from buyers |
| Reviews & Ratings | Customer feedback and your average rating |
| Notifications | Order updates, messages, and system alerts |
| Popote | Earn rewards by registering other sellers as a field agent |
| Settings | Your personal profile, contact verification, and password |
| Seller Manual | Opens this guide in a new tab |
My Business
Click Business in the sidebar then select My Business. This is your public-facing storefront on More Classifieds — buyers see this page when they visit your listing. A complete profile builds trust and improves visibility in search results.
Creating Your Business
If you haven't created a business yet, you'll see a prompt to get started. Click Create Business to open the two-step setup wizard.
Step 1 — Basic Info:
- Business Name (required) — The name that appears publicly on the marketplace.
- Description — A short paragraph describing what your business offers. Be specific — this text appears on your public profile.
- Category (required) — The primary category that best describes your business (e.g. Restaurants & Food, Retail, Services).
- Subcategory — A more specific classification within your category. Appears when subcategories are available for the selected category.
Step 2 — Location:
- Country — Select from the dropdown.
- County — Select your county. If your county isn't listed, choose Enter manually and type it — the system will attempt to verify the location via geocoding.
- Locality — Your specific area or neighbourhood within the county. Same manual-entry option applies.
Click Create Business on Step 2 to save. Once created, your business is submitted for review before going live on the marketplace.
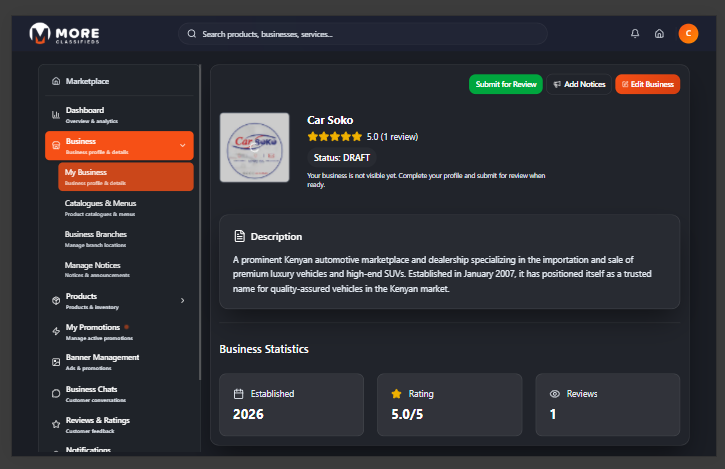
Editing Your Business
Once your business exists, the My Business page shows your profile card alongside info cards for status, creation date, and location. Click Edit on the profile card to update your name, description, category, subcategory, or location. Changes save immediately.
Additional editable sections below the profile card include:
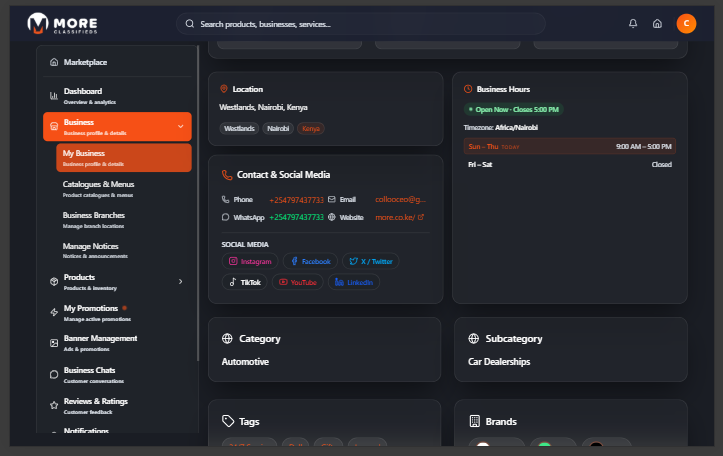
- Contact details — Phone, email, and social media links (Facebook, Instagram, X, WhatsApp, website).
- Business Hours — Click Business Hours to set your opening and closing times for each day of the week.
- Tags & Brands — Associate relevant tags and brands with your business to improve discoverability.
Logo and Cover Image
Your profile card has two image upload zones — the logo (circular) and the cover image (wide banner). Click the camera icon on either to upload:
- Logo — Recommended 400 × 400 px, square. PNG with transparent background works best.
- Cover image — Recommended 1280 × 480 px, landscape. Appears as a banner across the top of your public business page.
Drag and drop or click to browse your files. The image uploads and saves automatically.
Boosting Your Business
Click Boost Business on your profile to purchase a paid promotion that increases the visibility of your business listing across the marketplace. Select a boost package, duration, and complete payment. Active boosts appear under My Promotions in the sidebar.
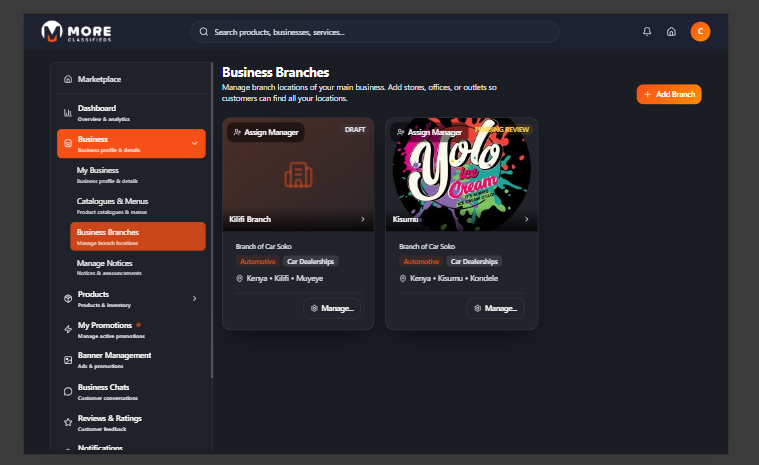
Business Branches
Click Business → Business Branches to manage additional physical locations for your business. Each branch has its own profile, product listings, notices, banners, and chat thread — all linked to your main seller account.
Adding a Branch
Click + Add Branch. The create form has the following fields:
- Branch name (required) — The public name of this location.
- Description — Optional short description of the branch.
- Country (required) — Select from the dropdown.
- Override category — Check this if this branch operates in a different category from your main business.
Click Create branch to save. The new branch appears as a card in your branches list. Click any branch card to open its management view, which has tabs for:
- Business Profile — Branch name, location, contact details, and assigned managers.
- Notices — Announcements for this branch's customers.
- Products — Products specific to this branch.
- Banners — Promotional banners linked to this branch.
- Chats — Customer messages directed at this branch.
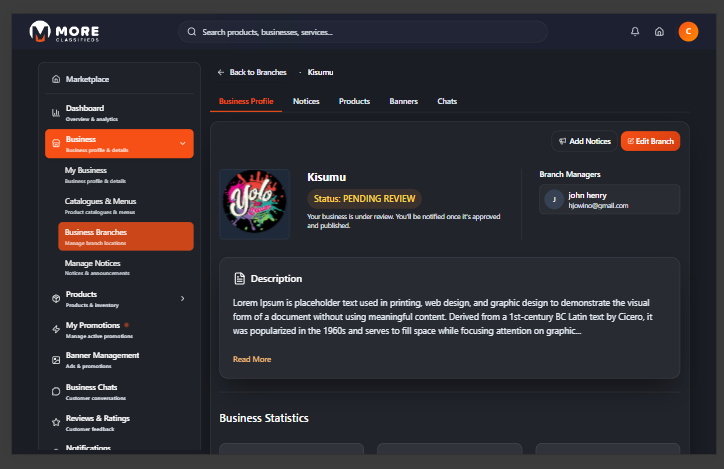
Assigning Managers
Click the Assign Managers button on a branch card to grant another user access to manage that branch. Managers can update branch details, handle orders, and respond to chats — without having access to your main seller account.
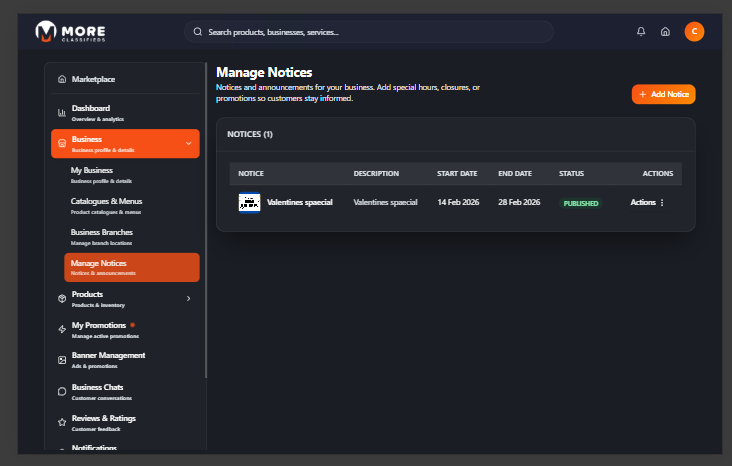
Manage Notices
Click Business → Manage Notices. Notices are short announcements that appear on your public business profile — use them to inform customers about promotions, new arrivals, temporary closures, or anything worth highlighting.
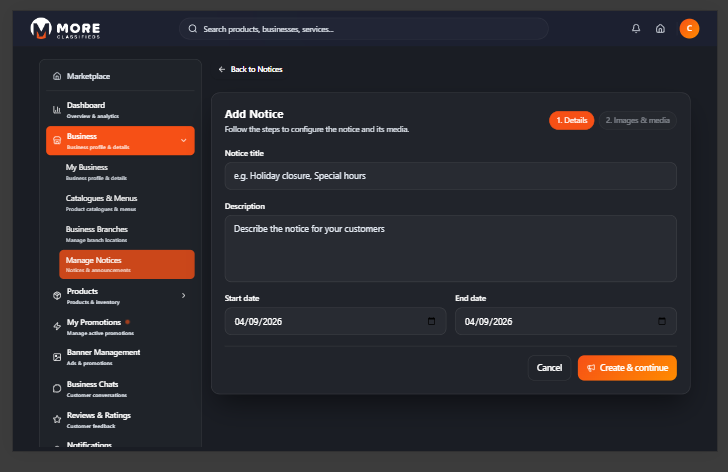
Creating a Notice
Click + Add Notice. The form has two steps:
- Details — Enter a Title (required), Description (optional), Start Date (required, defaults to today), and End Date (required). Click Continue.
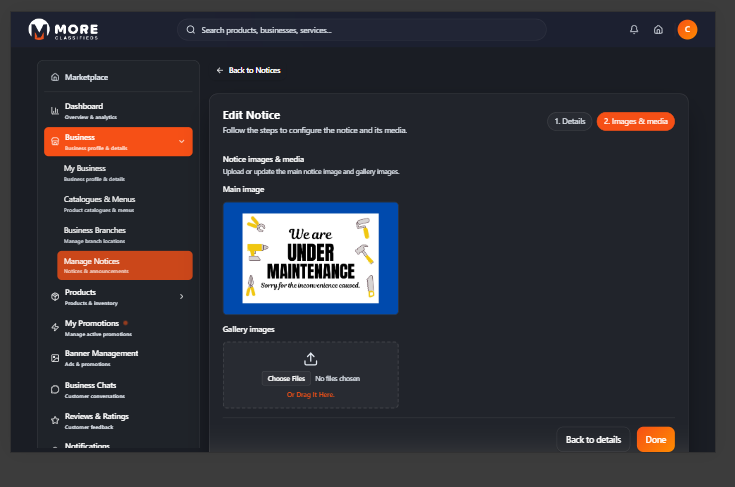
- Media — Upload one or more images to accompany your notice. Images appear alongside the notice text on your business profile. This step is optional — click Skip or Done when finished.
A new notice is saved as Draft. Click Send (the paper-plane icon) in the actions menu to submit it for review. Once approved it becomes Published.
Notice Statuses
Each notice moves through the following states:
| Draft | Saved but not submitted. Only visible to you. |
| Pending Review | Submitted and awaiting moderation. |
| Published | Live and visible to customers on your profile. |
| Paused | Temporarily hidden. Click Play to re-publish. |
| Rejected | Did not pass moderation. Edit and resubmit. |
| Archived | Ended notices moved to archive. |
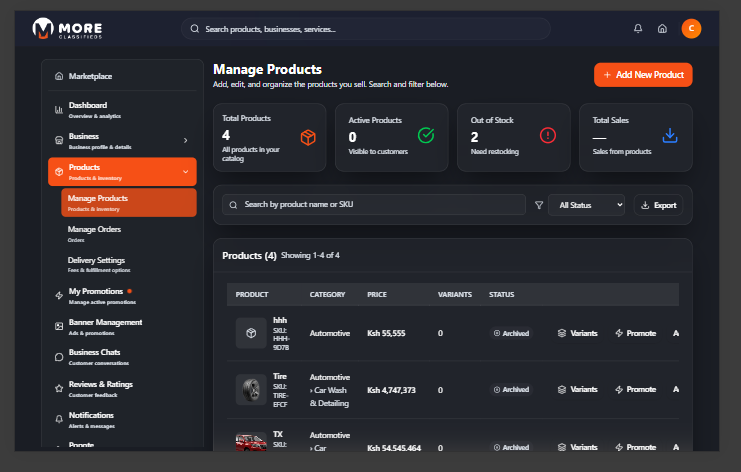
Manage Products
Click Products → Manage Products. Four stat cards at the top give you a live inventory summary — Total Products, Active Products, Out of Stock, and Total Sales. Below the cards your full product catalogue is shown in a searchable, filterable list. Use the search bar and status filter to find specific products quickly. An Export button lets you download your catalogue as a spreadsheet.
Adding a Product
Click + Add Product to open the five-step product form.
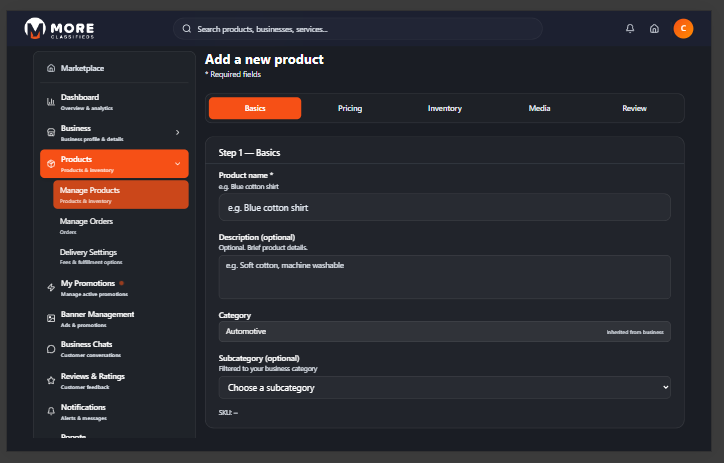
Step 1 — Basics:
- Product Name (required) — The full name as buyers will see it.
- Description — Detailed product information: materials, dimensions, features, care instructions.
- Category — Pre-filled from your business category, read-only.
- Subcategory — Optional. Filtered to your business category.
- SKU — Auto-generated. Shown read-only for your reference.
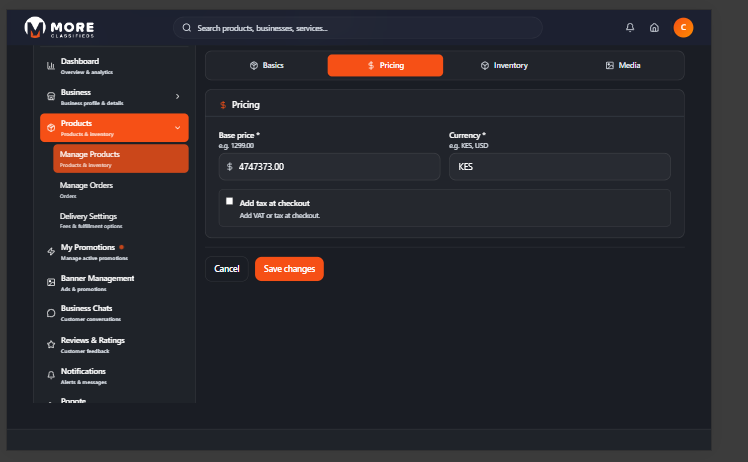
Step 2 — Pricing:
- Price (required) — Retail price in KES.
- Currency (required) — Defaults to KES.
- Add tax at checkout — Check this box to apply VAT or tax to this product at checkout.
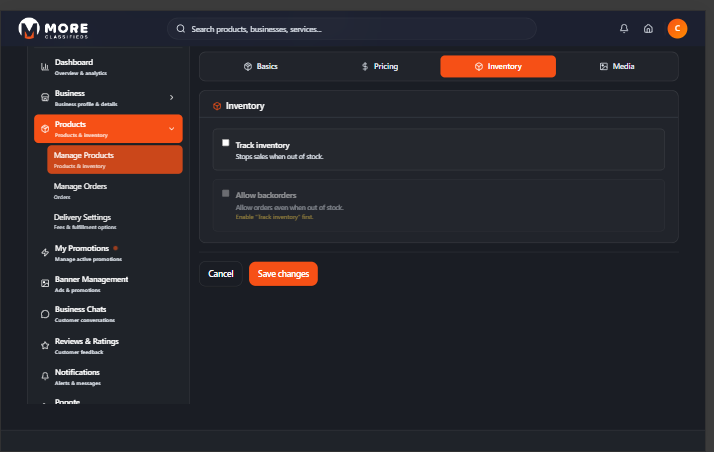
Step 3 — Inventory:
- Track stock — Enable to automatically mark the product out of stock when quantity reaches zero.
- Allow backorders — Let buyers purchase even when stock is depleted. Only available when Track stock is on.
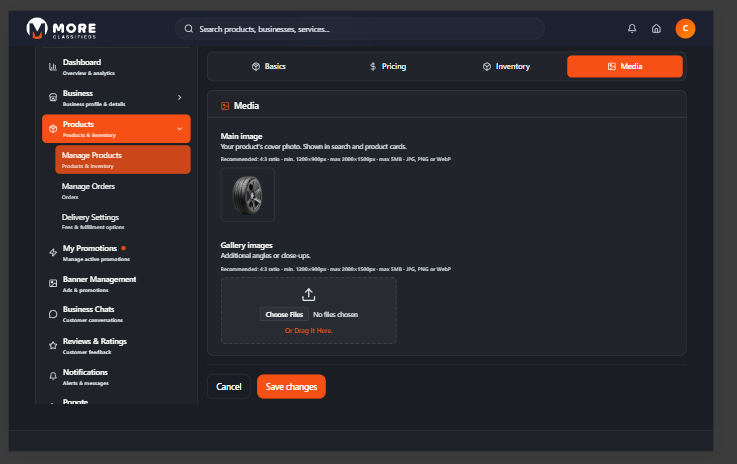
Step 4 — Media:
- Main image — The primary thumbnail shown across the marketplace. Recommended: 4:3 ratio, minimum 1200 × 900 px, max 5 MB, JPG / PNG / WebP. Drag and drop or click to browse.
- Gallery — Additional product photos (up to 8 total including the main image). Same format requirements.
Step 5 — Review: A summary of everything you've entered. Check for mistakes then click Save Product to publish, or go back to any step to edit.
Product Variants
If your product comes in multiple options — size, colour, material — add variants so buyers can choose before adding to cart. Open any product and click the Variants button in the page header to open the variants list. Click + Add variant to launch the three-step variant wizard.
Step 1 — Attributes:
- SKU — Auto-generated from the product name and the attributes you set. Updates as you fill in the form.
- Name (required) — The label buyers see for this option, e.g. Large / Red or 4x4 / SUV Tyre.
- Attributes — Click an attribute type button (Size, Color, Material, Flavor, Packaging, or Custom) to add that attribute. For Size you can pick standard values (XS, S, M, L, XL, 2XL, 3XL, One Size) or enter a custom value. Custom attributes let you define your own label and value (e.g. label: season, value: All-Season, Summer, Winter). You can add multiple attribute types to a single variant.
Click Next to proceed.
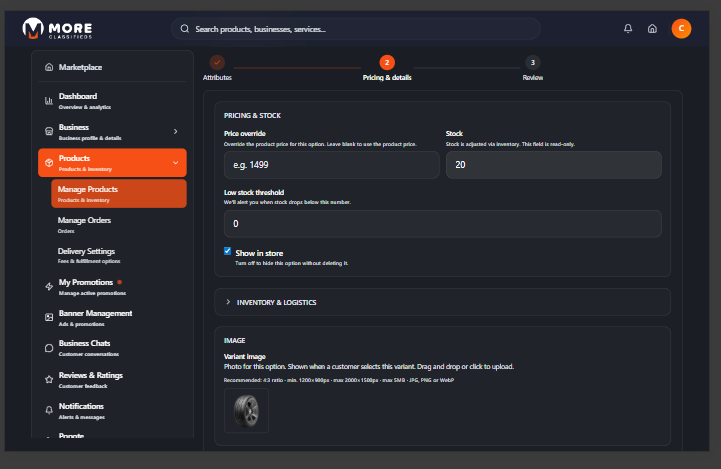
Step 2 — Pricing & details:
- Price override — Leave blank to use the parent product's price, or enter a specific price for this variant.
- Stock — Read-only. Stock is adjusted via the inventory system.
- Low stock threshold — You will be alerted when stock drops below this number.
- Show in store — Toggle off to hide this variant without deleting it.
- Variant image — Upload a photo specific to this variant (shown when the buyer selects it). Same format requirements as the main product image.
Click Next then review the summary and save.
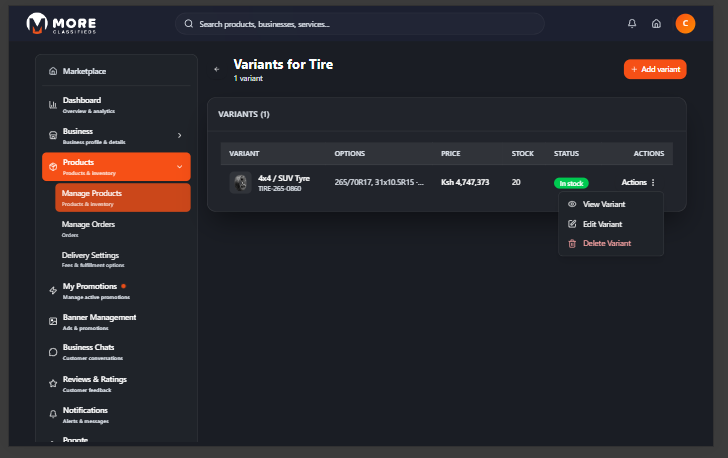
The variants list shows each variant's name, attribute options, price, stock level, and status. Use the three-dot menu on any variant to View, Edit, or Delete it.

Editing and Removing Products
Click the three-dot menu on any product row to access:
- View — Full product detail page with all fields and images.
- Edit — Opens the same five-step form pre-filled. Changes go live immediately on save.
- Boost — Purchase a paid promotion to increase the product's visibility in search results.
- Delete — Permanently removes the product. Cannot be undone.
Image quality drives sales
Listings with clear, well-lit photos on a clean background consistently receive more clicks and conversions than those with low-quality or missing images.
Manage Orders
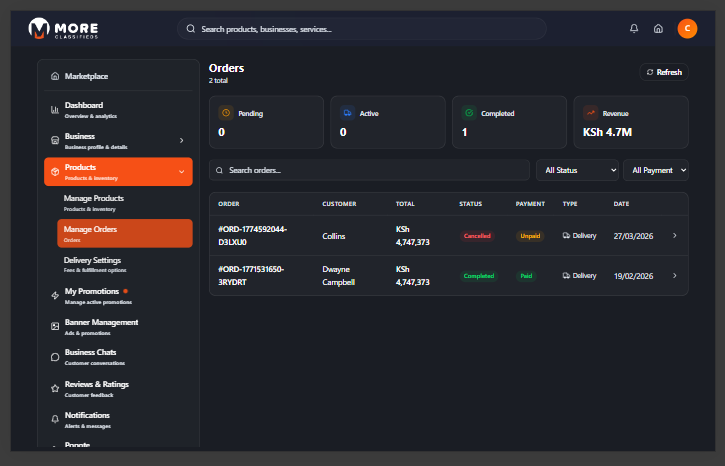
Click Products → Manage Orders to see all orders placed with your business. Four stat cards at the top give you a live summary — Pending, Active, Completed, and Revenue. Below the cards orders are listed with the most recent at the top. Use the Order Status and Payment Status dropdowns to filter, or use the search bar to find a specific order number or customer name.
Order Statuses
| Pending | Order placed but not yet confirmed by you. |
| Confirmed | You have accepted the order. Buyer is notified. |
| Ready for Pickup | Order is packaged and ready for the courier or buyer collection. |
| Dispatched | Order has been handed to a courier or is on its way. |
| Received | Buyer has confirmed receipt. Order is complete. |
| Cancelled | Order was cancelled by you or the buyer. |
Actioning an Order
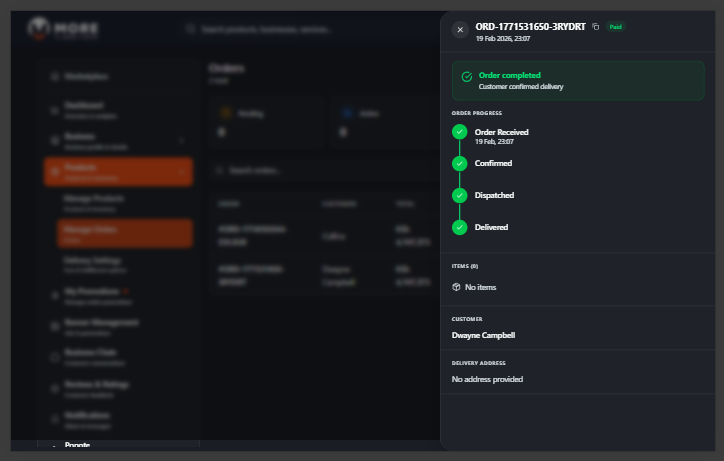
Click any order row to open its detail panel. The panel shows the buyer's name, contact number, delivery address, items ordered with quantities and prices, and the payment status. Use the action buttons to move the order through its lifecycle:
- Confirm — Accept the order. Buyer receives a notification.
- Mark Ready — Signal the order is packaged and ready.
- Dispatch — Mark as dispatched once it's with a courier.
- Mark Received — Close the order once delivered.
- Cancel — Cancel the order. Contact the buyer via chat first.
Payment is on delivery
All orders on More Classifieds are pay on delivery. You or your courier collect payment — cash or M-Pesa — from the buyer at handover. There is no online payment processing.

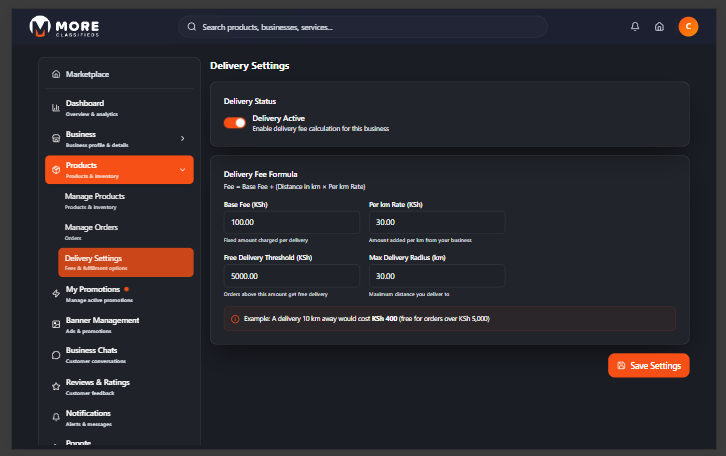
Delivery Settings
Click Products → Delivery Settings to configure how delivery fees are calculated for your orders. These settings apply to all products in your catalogue.
The following fields are available:
- Base Fee (KSh) — A flat fee charged on every order regardless of distance.
- Per km Rate (KSh) — An additional charge for each kilometre of delivery distance beyond the base coverage.
- Free Delivery Threshold (KSh) — Order total above which delivery is free. Leave blank to always charge delivery.
- Max Delivery Radius (km) — The furthest distance you are willing to deliver. Orders outside this radius cannot be placed.
- Delivery Active — Toggle this on to enable delivery for your business. Turn it off if you only offer self-pickup.
Click Save when done. Changes take effect immediately for new orders.
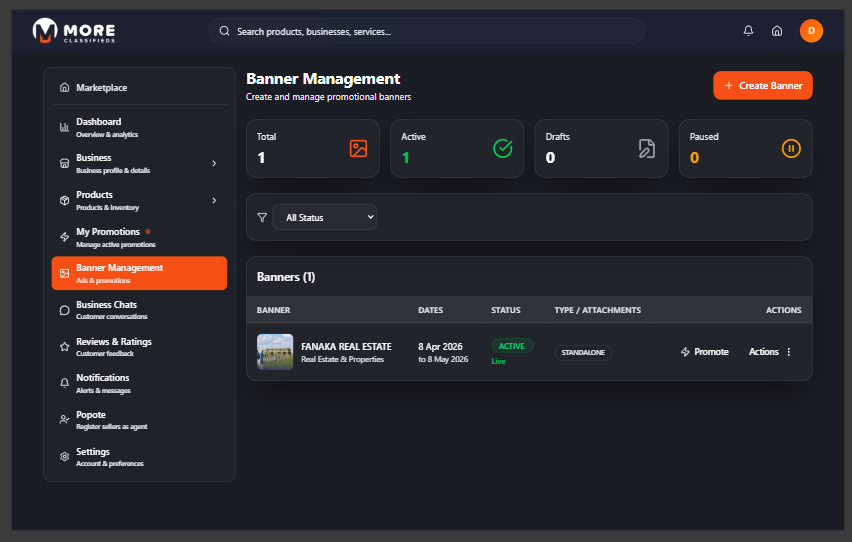
Banner Management
Click Banner Management in the sidebar. Banners are promotional images that appear on the More Classifieds homepage and category pages. The page header shows stat cards for your Total, Active, Draft, and Paused banners.
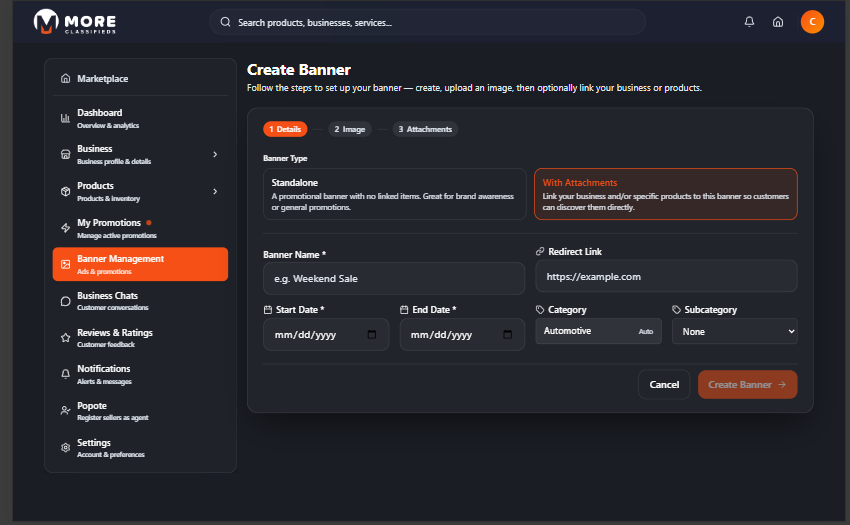
Creating a Banner
Click + Create Banner. The form has up to three steps depending on the banner type you choose.
Step 1 — Details:
- Banner Type — Choose one:
- Standalone — A simple image banner. Buyers who click it are taken to your redirect link.
- With Attachments — Links directly to specific businesses or products in your account. A third step (Attachments) is added to the form.
- Banner Name (required) — An internal label to identify this banner.
- Redirect Link — Where buyers land when they click the banner. Optional for Standalone banners.
- Start Date (required) — When the banner should go live.
- End Date (required) — When the banner campaign ends. Must be after the start date.
- Category — Auto-filled from your business category. Read-only.
- Subcategory — Optional. Determines which category page the banner appears on.
Click Create Banner to save Step 1 and advance.
Step 2 — Image: Upload your banner image. Drag and drop or click to browse. Recommended dimensions:
- Hero Banner: 1920 × 480 px (4:1 ratio)
- Top Business Banner: 1280 × 480 px (8:3 ratio)
- Formats: JPG, PNG, WebP — max 5 MB
Click Upload after selecting a file. You can skip image upload and add it later from the banner detail page.
Step 3 — Attachments (With Attachments banners only):
- Select a branch from the Branch dropdown and click Attach Business to link your business (or a specific branch) to the banner.
- Select a product from the Product dropdown and click Attach Product to link a product. You can attach multiple products — each appears as a card with a remove button.
Click Done to finish.

Managing Banners
Each banner row shows its name, status, active date range, and image thumbnail. Use the three-dot menu to:
- View — Open the banner detail page to edit name, link, dates, image, or attachments.
- Activate — Make the banner live. Requires an uploaded image and the current date to be within the active period.
- Pause — Temporarily hide the banner without deleting it.
- Resume — Re-activate a paused banner.
- Promote — Purchase a paid boost to increase the banner's reach and placement.
- Archive — Move an ended campaign to the archive.
- Delete — Permanently remove the banner.
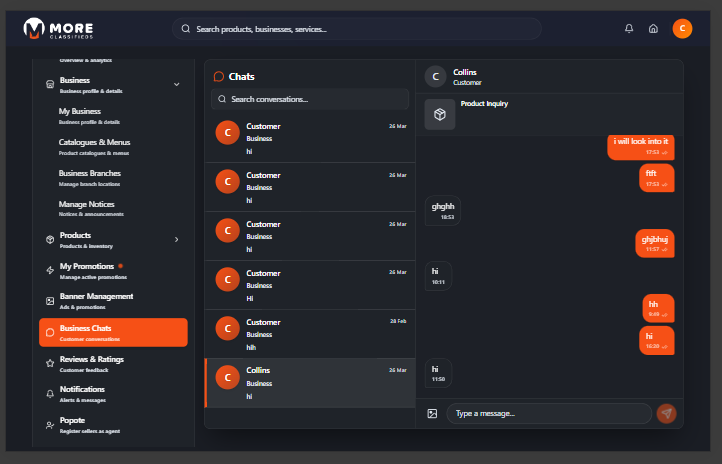
Business Chats
Click Business Chats in the sidebar to see all customer conversations. A badge on the sidebar item shows the count of unread messages.
The left panel lists all active conversations — showing the buyer's name, a preview of their last message, and the timestamp. Click any conversation to open the full thread on the right. Type your reply in the box at the bottom and press Enter or click Send.
- Search — Use the search bar at the top of the conversation list to find a buyer by name.
- Message history — All messages are stored permanently.
- Unread indicator — Conversations with unread messages are highlighted in the list.
Respond promptly
Buyers who receive replies within a few hours are significantly more likely to place an order. Treat chat response time the same way you would a phone call from a customer.
Reviews & Ratings
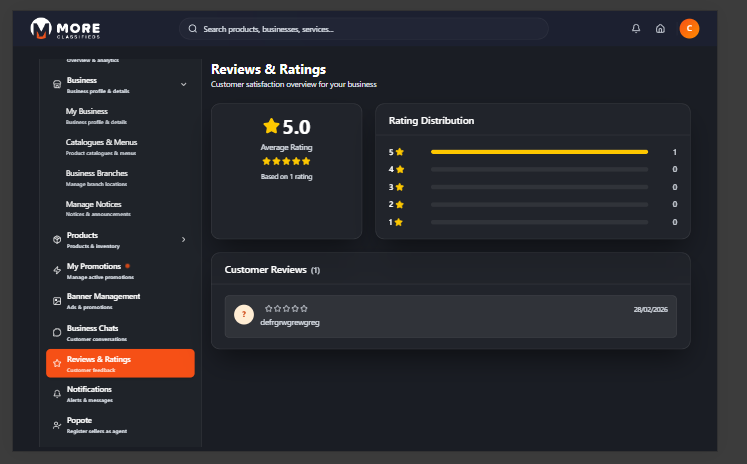
Click Reviews & Ratings in the sidebar to see what customers are saying about your business. The top of the page shows a summary panel with your overall star rating and a bar breakdown of 5-star through 1-star ratings.
Below the summary is a paginated list of individual customer reviews. Each review shows the reviewer's name (or initials), their star rating, the review text, and the date posted. Use the Previous and Next buttons to page through all reviews.
Reviews are submitted by buyers after completing an order. You cannot remove reviews but you can use the feedback to improve your products and service.
Settings
Click Settings in the sidebar to manage your personal account — separate from your business profile. Settings controls your login credentials and contact verification.
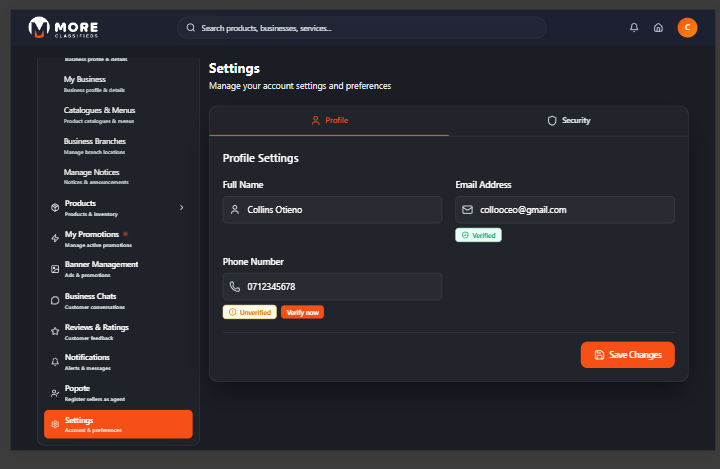
Profile
Your profile card shows your full name, email address, and phone number. Click Edit Profile to update any of these. Each contact field displays a verification badge:
- Email — Green Verified badge once OTP confirmed. Click Verify Email to trigger a 6-digit OTP sent to your email.
- Phone — Orange Unverified badge until confirmed. Click Verify Phone to trigger an SMS OTP to your number.
The verification modal walks you through sending and entering the OTP — the same 6-digit box flow used during registration.
Password & Security
Scroll to the Password & Security section and click Change Password. Enter your current password, then your new password twice to confirm. Your new password must be at least 6 characters.
My Promotions
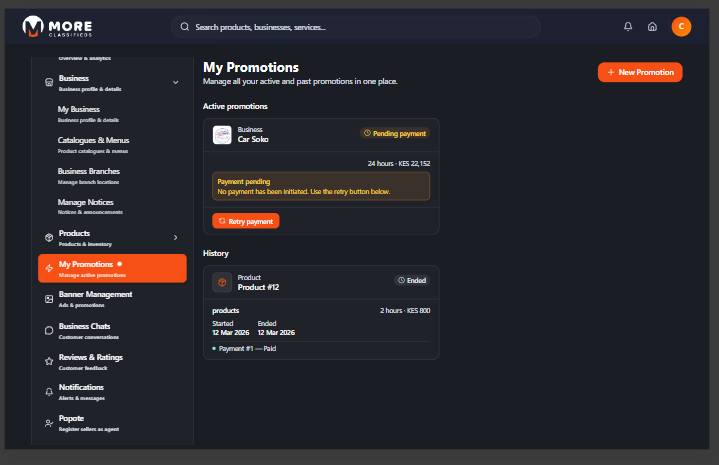
Click My Promotions in the sidebar to see all paid boosts you have purchased for your business, branches, or products. The page is split into two sections — Active promotions and History. Click + New Promotion in the top-right corner to purchase a new boost.
Active Promotions
Each active promotion card shows what is being boosted (business or product name), its current status, and the duration and cost of the package. Possible statuses:
- Pending payment — A promotion was created but payment has not yet been completed. An orange warning is displayed: "No payment has been initiated. Use the retry button below." Click Retry payment to trigger the M-Pesa STK push to your registered phone number.
- Active — The promotion is live and your listing is being boosted across the marketplace.
- Paused — The promotion has been temporarily suspended.
Payment is via M-Pesa
All promotions are paid via M-Pesa. If you see a Pending payment status, no charge has been made yet — use Retry payment to complete the transaction.
Promotion History
The History section lists all ended promotions. Each entry shows the promoted item (business or product), the boost type and duration, the cost, start and end dates, and the payment record. Use this as a reference when planning future boosts.
You can also start a new promotion directly from a product, banner, or business profile by clicking the Boost or Promote button on that item.
Notifications
Click Notifications in the sidebar to view all your alerts and messages. Notifications keep you informed about activity across your account — including new orders, order status changes, messages from buyers, moderation outcomes for notices and banners, and system announcements from More Classifieds.
A badge on the bell icon in the top navigation bar shows the count of unread notifications. Click the bell or navigate to the Notifications page to view them. Clicking any notification takes you directly to the relevant item — e.g. clicking an order notification opens that order's detail panel.
Notifications are listed in reverse chronological order. Unread notifications are highlighted. Once viewed, they are marked as read automatically.
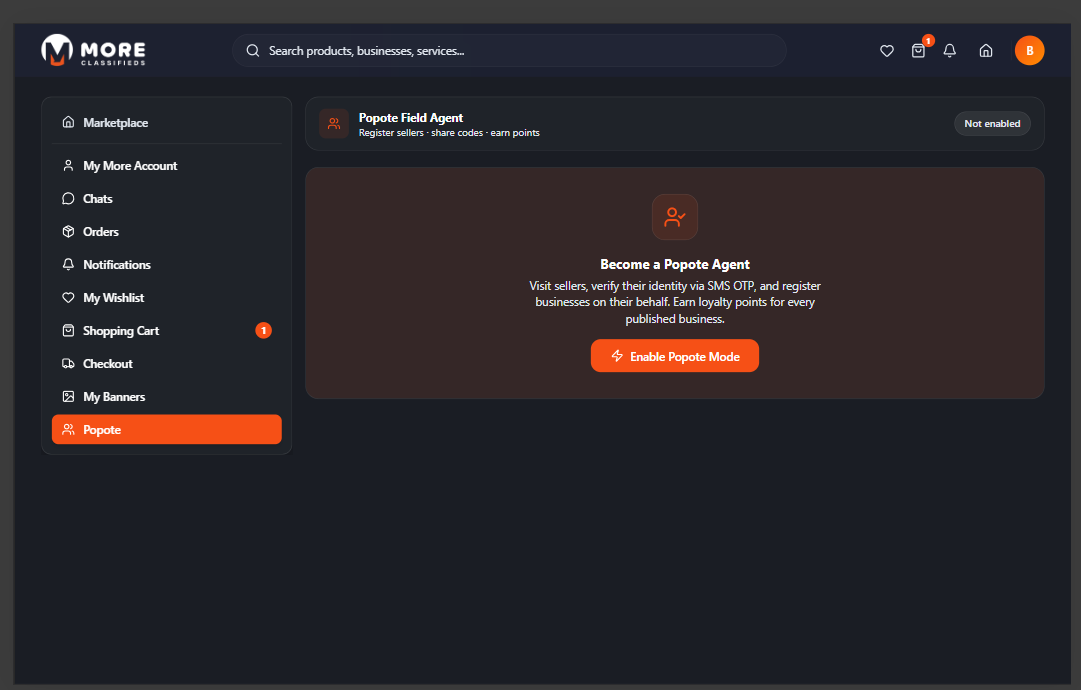
Popote
Click Popote in the sidebar to access the More Classifieds field agent programme. Popote lets you earn rewards by registering other businesses as sellers on the platform. It is available to both sellers and buyers.
As a Popote agent you receive a referral commission for every new seller you successfully onboard. The Popote dashboard shows your referral link, the number of sellers you have registered, and your total earnings.
- Your referral link — Share this unique link with business owners. When they sign up using your link and complete registration, the referral is credited to your account.
- Registered sellers — A list of all sellers you have referred and their account status.
- Earnings — Commission is credited once a referred seller's account is approved and active on the marketplace.
Grow your earnings
Focus on businesses in your area that don't yet have an online presence — they benefit most from joining More Classifieds, and you earn every time one of your referrals goes live.
Need more help?
support@more.co.ke